
Chinese New Year Lanterns in 3rd and 4th Grade


The beginning of the winter semester is always unpredictable. We miss days and have interruptions with holidays and college week. I decided to start off the semester with winter and Chinese new year themed projects. 
I found this Chinese lesson on Instagram. I share my personal pictures and some some art lessons on my BethCarter77 site. Some teachers have a totally separate classroom site. 
I don't, but I save those posts for my class twitter site. 

Check out this awesome CNY site with worksheets and Videos too!


Back to Instagram, I love Instagram and I love photos and the friends that I have made on IG.
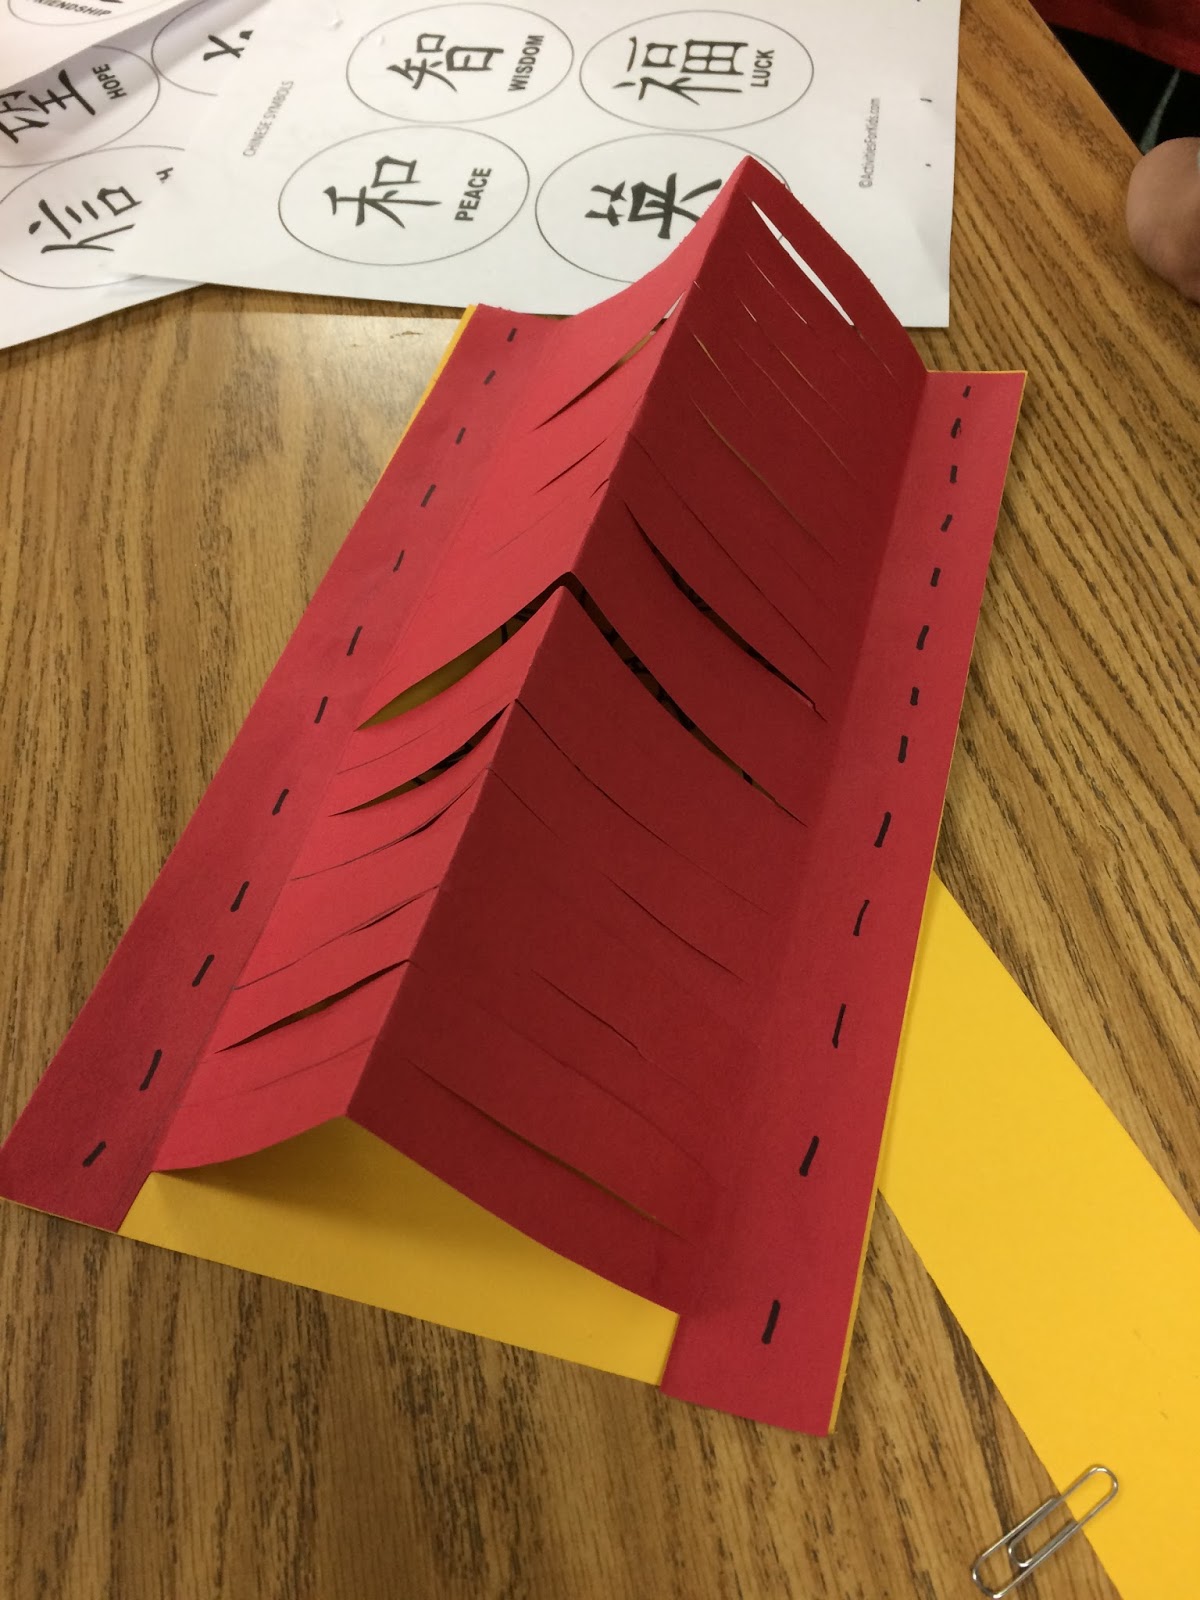
 I found Mr. DeWilde and this great Chinese New Year Lantern lesson in a feed of Art Teachers that post on Instagram.  He was also nice enough to share with me his paper sizes. Check him out!


The red paper on the large lantern is 9 x 12 and the gold/yellow paper is 7 x 9.
Fold it like a Hot dog, and make thick or then cuts to a guide line through folded paper. 
Very similar to paper weaving. 

I am going to have my classes that I missed make a mini version.


I encouraged the kids to draw traditional Asian Cultural images. 
We also checked out this website and many books from our Library. 


I printed up some Chinese word sheets and most of my student's have personal devices to look up words and images. Many of my student's are also Chinese. I learned that the Chinese Lantern Festival is a week after the Chinese New Year starts. This year it starts on February February 15th.  Chinese New Year starts on February 8th. 

On day two we assembled the lanterns during the last half of the class period with 
Glue all and Staples. 


Notice that we removed one slit to allow over lapping when you twirl into the form. 
 Either staple or glue.

Add a handle and you are finished with very happy kiddos. We are going to display them in our library next month! 

The thinner cuts seemed to show their artwork better. 


Notice the little mini for the odd classes that missed a week. So Cute!

Happy New Year!

Comments

  1. I just stumbled upon your blog. I really like the projects you have. The lanterns came out beautifully. I still have fond memories of my elementary art classes. I hope they my kids get a good art teacher like you when they begin school in a few years.

    Great job!

    ReplyDelete

Post a Comment

Thank you for visiting and leaving a comment. Beth

Most popular post

Kandinsky Trees

My first graders really need help with their fine motor skills this year. After completing a very successful Kandinsky Concentric Circle painting lesson noted below, I followed up this past week with a tree inspired lesson. Once again, I found my inspiration from  Jen Draw the Line At  and I used her lesson suggestions for this very successful lesson. My student's used Crayola Metallic crayons instead of the Crayola Construction paper crayons and we used juice lids for some bigger circles in the stamping part of the lesson.  Day 1 On day two constructed the trees and circle leaves. I passed out a 12 x 4 inch piece of black paper and had two different sizes of  square paper for the circles. Yes, this was a challenge since we did not use pencil, but we drew with our scissors. Day 2 I will definite repeat lesson for next year! I will be displaying these soon.  Displayed artwork is posted  HERE

Monet's Pond

The Dallas Museum of Art  has a wonderful   Monet Painting  in a beautiful gold frame which inspired me to create this lesson for our Big Art Day which is fast approaching in Texas schools.  For our Big Art day this year I have a Theme....Circle Art!  Themes are the way to go when organizing events.  I love this new lesson that was inspired by one of my favorite artists,  and two favorite bloggers:  Painted Paper and Cassie Stephen's who also use themes.  I ordered the 10 inch cardboard circle rounds for this lesson, the same size  Cassie used in her Dot Day Art .  School Specialty has various sizes. The kids loved painting on this canvas instead of paper.  We read about Monet's garden and look at prints of his masterpieces. I even show them some of my pictures that I took when I   visited his garden in France.   On day one, we painted the pond and the water lily pond on a 10 inch cardboard circle  on the white side with Pr

Clay and Weaving!

I'm brave, I tried a new lesson again.... I can say as we are completing these clay frames that you have to follow some basic rules or you will have broken frames. We have had only 3, but I did make extras.  My 4th graders tackled this lesson with stoneware clay, and finished them with oil pastels, one color of watercolor paint and I painted modge podge on them when dry.   The texture is the key part of the coloring process! I have rollers and rubber texture mats.  At least pencil think and more than 2 fingers in width.  You need some lid tracers and a pin tool. Don't try to cookie cutter it.  I strongly recommend 15 or 19 holes punched with a straw. You must have an odd number!! If they go hole craze, pop out the clay from the straw and plug the holes.  I found the directions for weaving the warp threads here on Cassie Stephen's blog.   I am also doing her plate weaving at the same time with 2nd grade.  This is ho