
Accordion Card Making


In honor of my Dad's 90th Birthday I recently made him a huge accordion card with 90 candles.


These accordion style cards are fun to make and can be created in different sizes and shapes.  I decided to try and use items that were currently in my art space since it is so hot here in Texas, and I was not looking to go out and shop when it is 105 degrees. The only thing I ended up buying were the pictures I had copied at Walgreens. 


So how did I make it?


I started off with a bronze colored card stock that came in an assorted package from Michaels. It was just in my stash! 

I selected a sheet of 11" x 8 1/2"  card stock and cut it in half to 4 1/4" x 11"

I scored and folded each piece in half. 


I used a decorative tape that was about 1 inch wide to join the pieces together. 
I also applied the tape so that it would show on the back only. 

This is where you have to decide how big your card or booklet will be. I ended up putting 9 candles on each page and wanted a front and back cover so I used 12 panels according to my needs. 


Next, I used assorted papers and old birthday cards to make the candles. I used a small Fiscars paper cutter to make them 1/2 inch by 3 inches. I used a glue stick to place them on the card stock. 
There is a free candle with flame on Cricut Design space if you want to cut them out on your machine. 


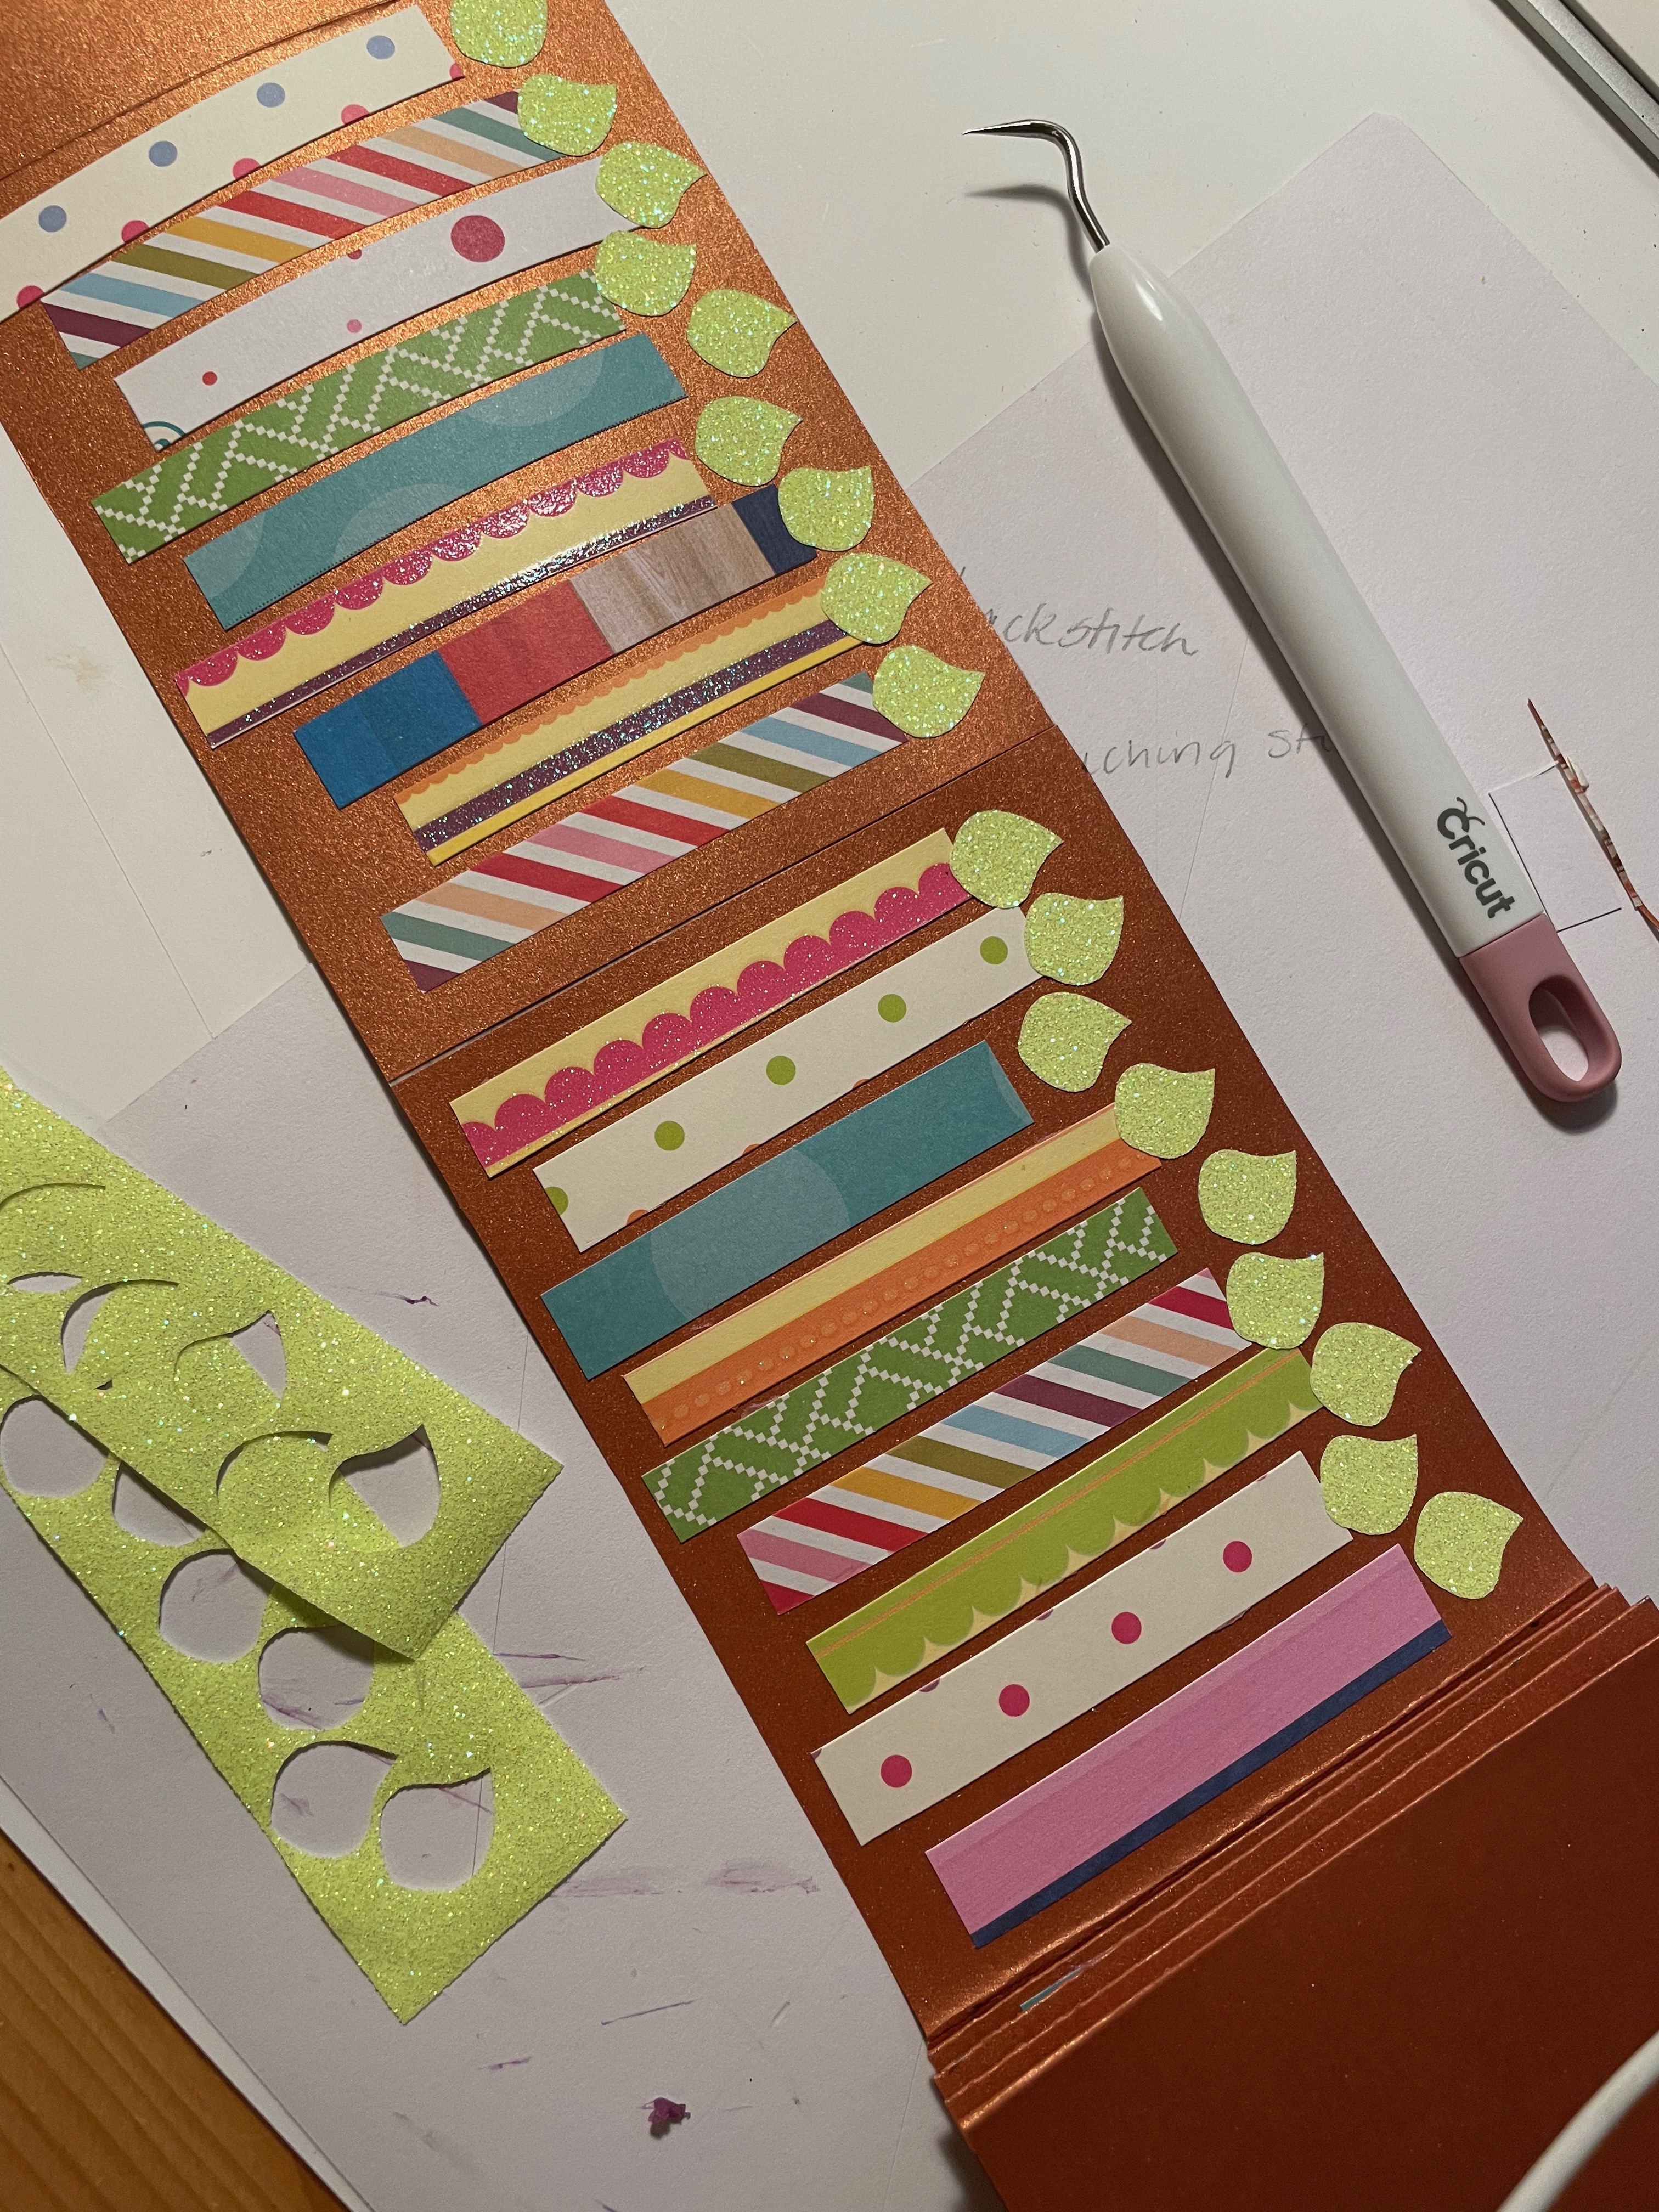
When adding the flames, I considered just painting them on.. but I had left over glitter iron on vinyl scrapes, and I ended up making a flame on Canva. I uploaded it to Design Space
 and cut them out on my Cricut.

 Yes you can use iron on vinyl on paper... just heat lightly with an iron. 
You could also use card stock or whatever you have handy. 

If you have students making a book, they could use magazines or anything from your scrap box. 
This could also be a great way to create a mini sketchbook or Book about Me! 

Finally I added covers on the front and Back... again to keep my theme cohesive I used my Cricut and regular vinyl for the front and back lettering as well as scrap paper. 


Here is the final card! 


My dad and my stepmom were pretty excited since cards are a big deal to them. It also put into perspective how many years 90 really is.  My husband has a significant Birthday coming up so I may have to make him one as well.  Have fun creating! 


Comments

Most popular post

Kandinsky Trees

My first graders really need help with their fine motor skills this year. After completing a very successful Kandinsky Concentric Circle painting lesson noted below, I followed up this past week with a tree inspired lesson. Once again, I found my inspiration from  Jen Draw the Line At  and I used her lesson suggestions for this very successful lesson. My student's used Crayola Metallic crayons instead of the Crayola Construction paper crayons and we used juice lids for some bigger circles in the stamping part of the lesson.  Day 1 On day two constructed the trees and circle leaves. I passed out a 12 x 4 inch piece of black paper and had two different sizes of  square paper for the circles. Yes, this was a challenge since we did not use pencil, but we drew with our scissors. Day 2 I will definite repeat lesson for next year! I will be displaying these soon.  Displayed artwork is posted  HERE

Monet's Pond

The Dallas Museum of Art  has a wonderful   Monet Painting  in a beautiful gold frame which inspired me to create this lesson for our Big Art Day which is fast approaching in Texas schools.  For our Big Art day this year I have a Theme....Circle Art!  Themes are the way to go when organizing events.  I love this new lesson that was inspired by one of my favorite artists,  and two favorite bloggers:  Painted Paper and Cassie Stephen's who also use themes.  I ordered the 10 inch cardboard circle rounds for this lesson, the same size  Cassie used in her Dot Day Art .  School Specialty has various sizes. The kids loved painting on this canvas instead of paper.  We read about Monet's garden and look at prints of his masterpieces. I even show them some of my pictures that I took when I   visited his garden in France.   On day one, we painted the pond and the water lily pond on a 10 inch cardboard circle  on the white side with Pr

Clay and Weaving!

I'm brave, I tried a new lesson again.... I can say as we are completing these clay frames that you have to follow some basic rules or you will have broken frames. We have had only 3, but I did make extras.  My 4th graders tackled this lesson with stoneware clay, and finished them with oil pastels, one color of watercolor paint and I painted modge podge on them when dry.   The texture is the key part of the coloring process! I have rollers and rubber texture mats.  At least pencil think and more than 2 fingers in width.  You need some lid tracers and a pin tool. Don't try to cookie cutter it.  I strongly recommend 15 or 19 holes punched with a straw. You must have an odd number!! If they go hole craze, pop out the clay from the straw and plug the holes.  I found the directions for weaving the warp threads here on Cassie Stephen's blog.   I am also doing her plate weaving at the same time with 2nd grade.  This is ho