

#Bigartday17 is tomorrow in Texas. We had a big art time making cakes and pie in 5th grade this past 9 weeks. It was fun, it was messy, but I overheard many time, "this is the best project ever!"
My inspiration was the lesson that Rita Martin posted on the Art Teacher Facebook page last year. I ordered the claycrete from Amaco that she recommended from School Speciality at the end of last year when I had some money left in my school spending account.
I ordered the large box and had some left over. I have 100 students.
I introduced the lesson using Wayne Thiebaud paintings and this video.
On day one the students research the pie or cake they wanted to make. They also had to cut out a template from a cereal box that they brought and tape it together.
Use 3M tape, the cheap stuff didn't stay stuck.
I made several templates but a few made their own.
We also referenced this slide from the AOE


You can play around with the templates. I may make them a tad smaller in the future.

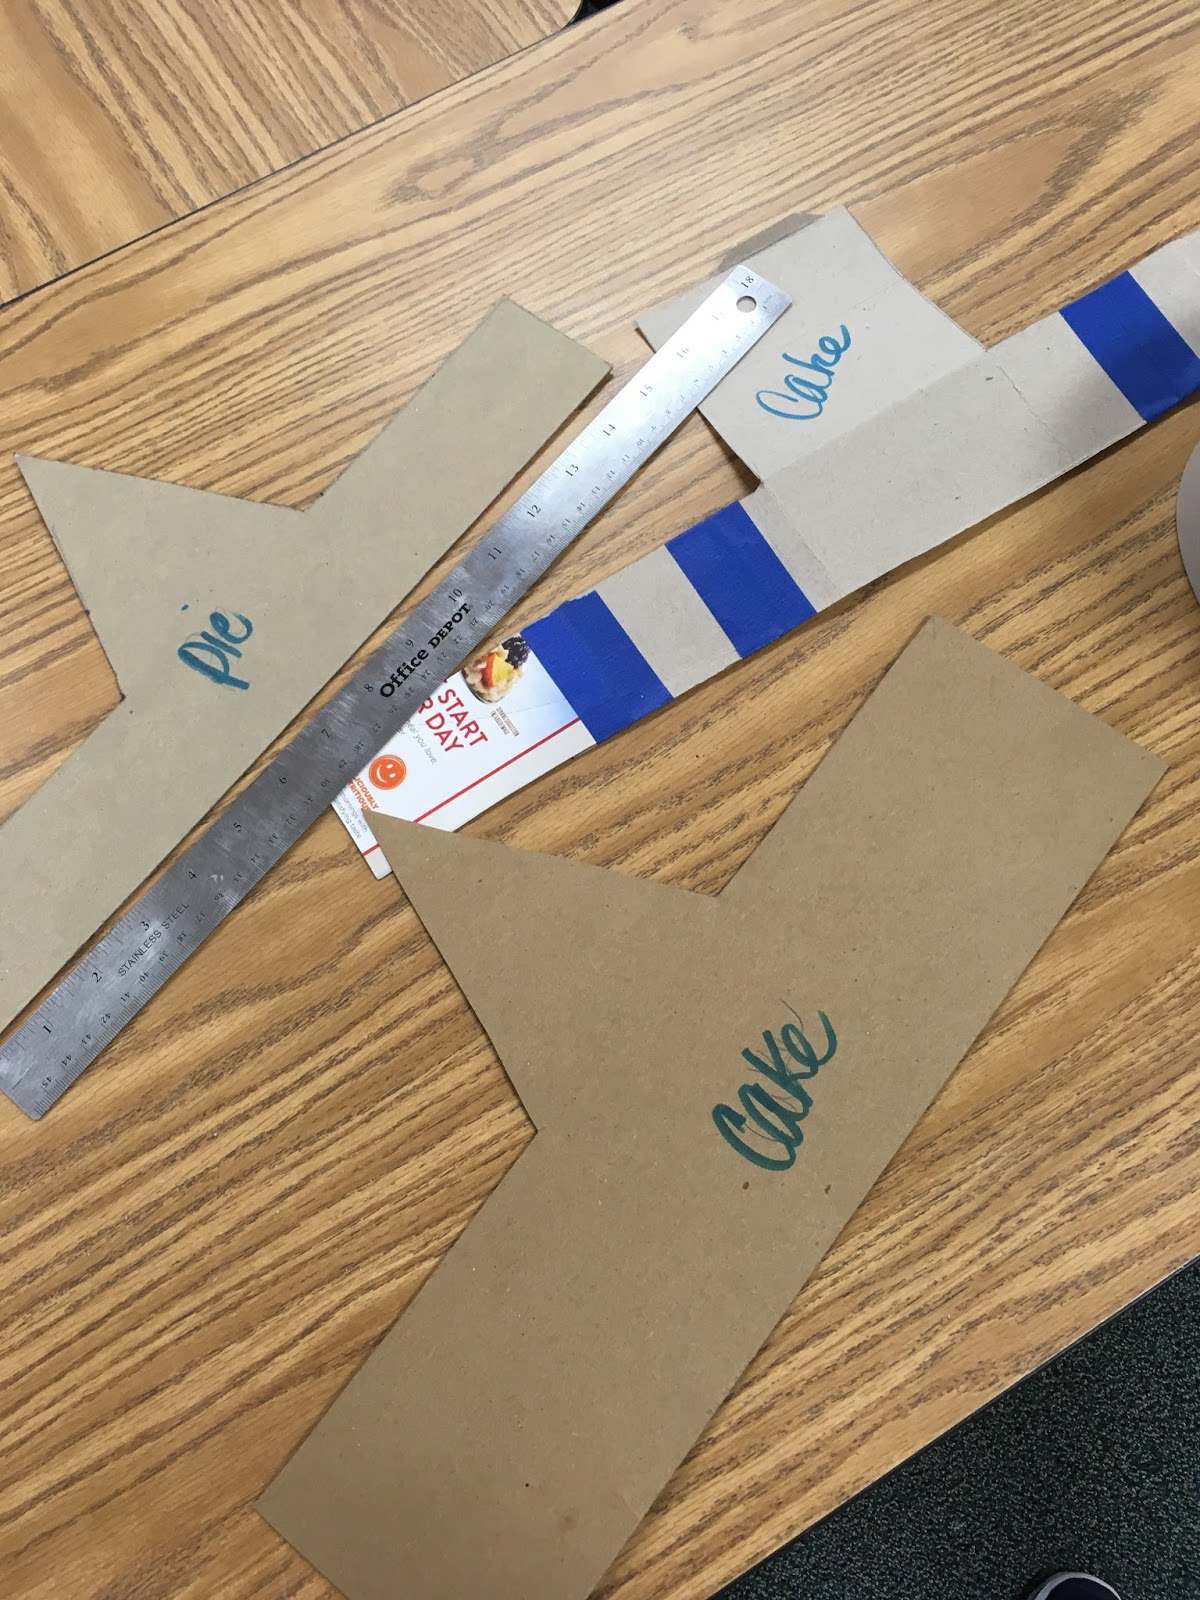

And that one kid that wants to be different....:)

Some added the crust with extra cardboard too.
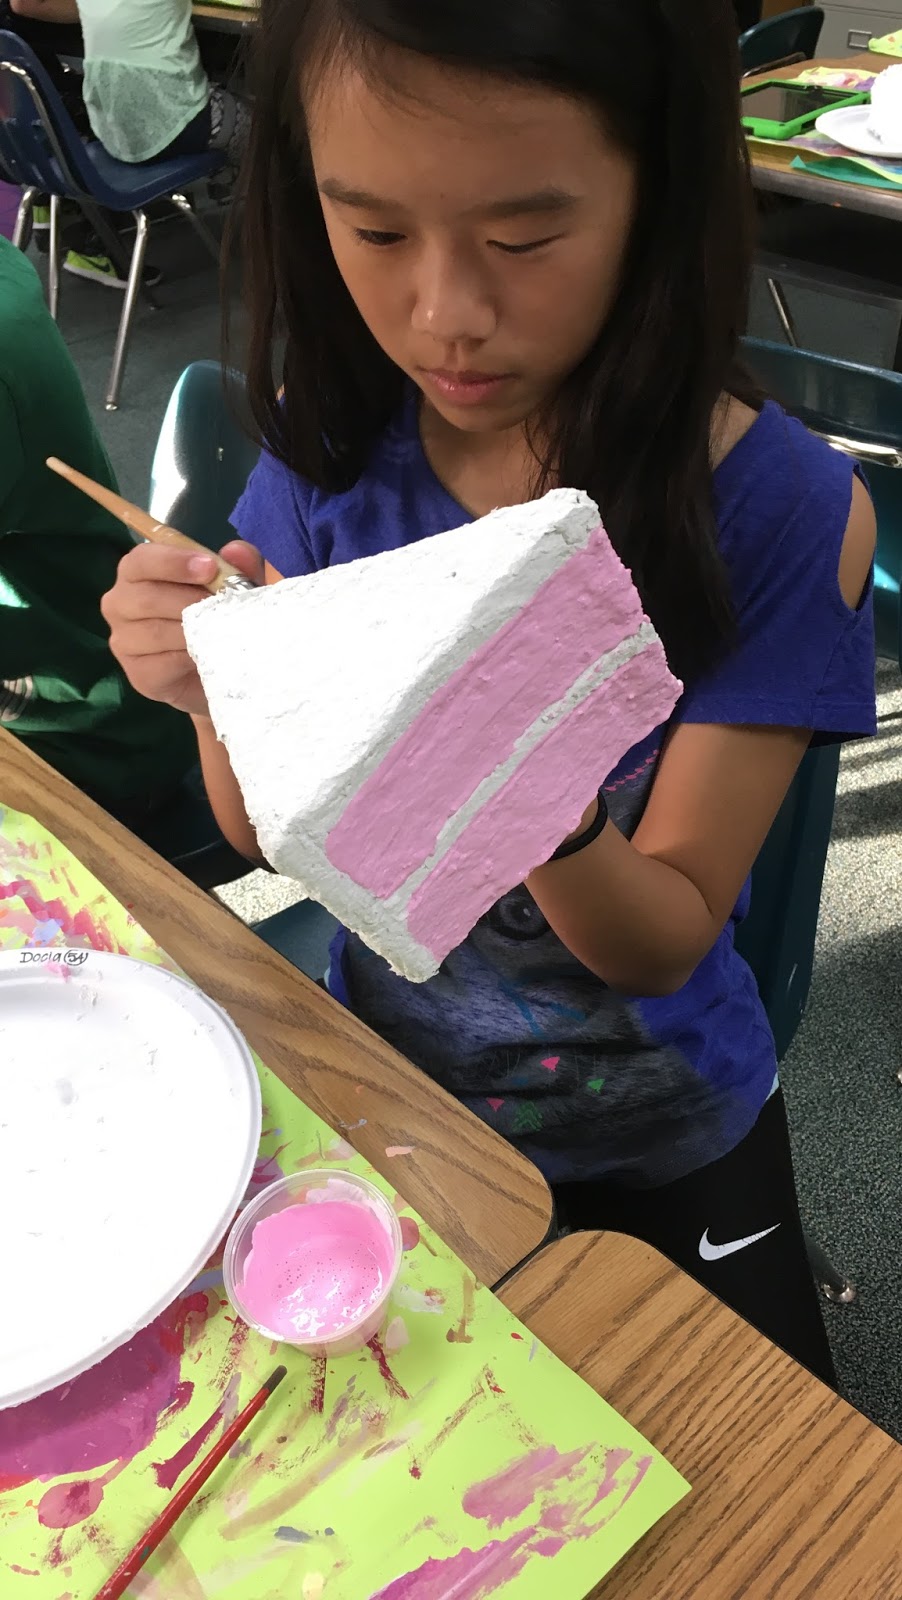
On day two we did the paper pulp step with the claycrete .
I mixed it with warm water outside my classroom before they came in. Since I don't have warm water in my room, I used a tea pot to warm the water. Old school art at its best!
The claycrete needs to be mixed like meatloaf. We made patties with the paper and pressed the patty on the side of the form and then spread it out thin with one hand inside the form and the other pressing. Thin is the key. Some students used a craft stick to spread it too.

They need a plate to work on also. This helped to contain the mess. I did have to wipe out the sinks, clean the door handles and pretty much hope the custodian came back the next day. All of this had to be done in one class period. I blocked out a week for this. I also did a smaller lesson with the same material with my following 2nd grade class to make clean up easier.

This was from Cassie Stephens blog. I will post more on this later.
On day 3 we painted a base coat of paint on the dessert. Mixing was fun!
Don't look at the carpet in my classroom, yes carpet.

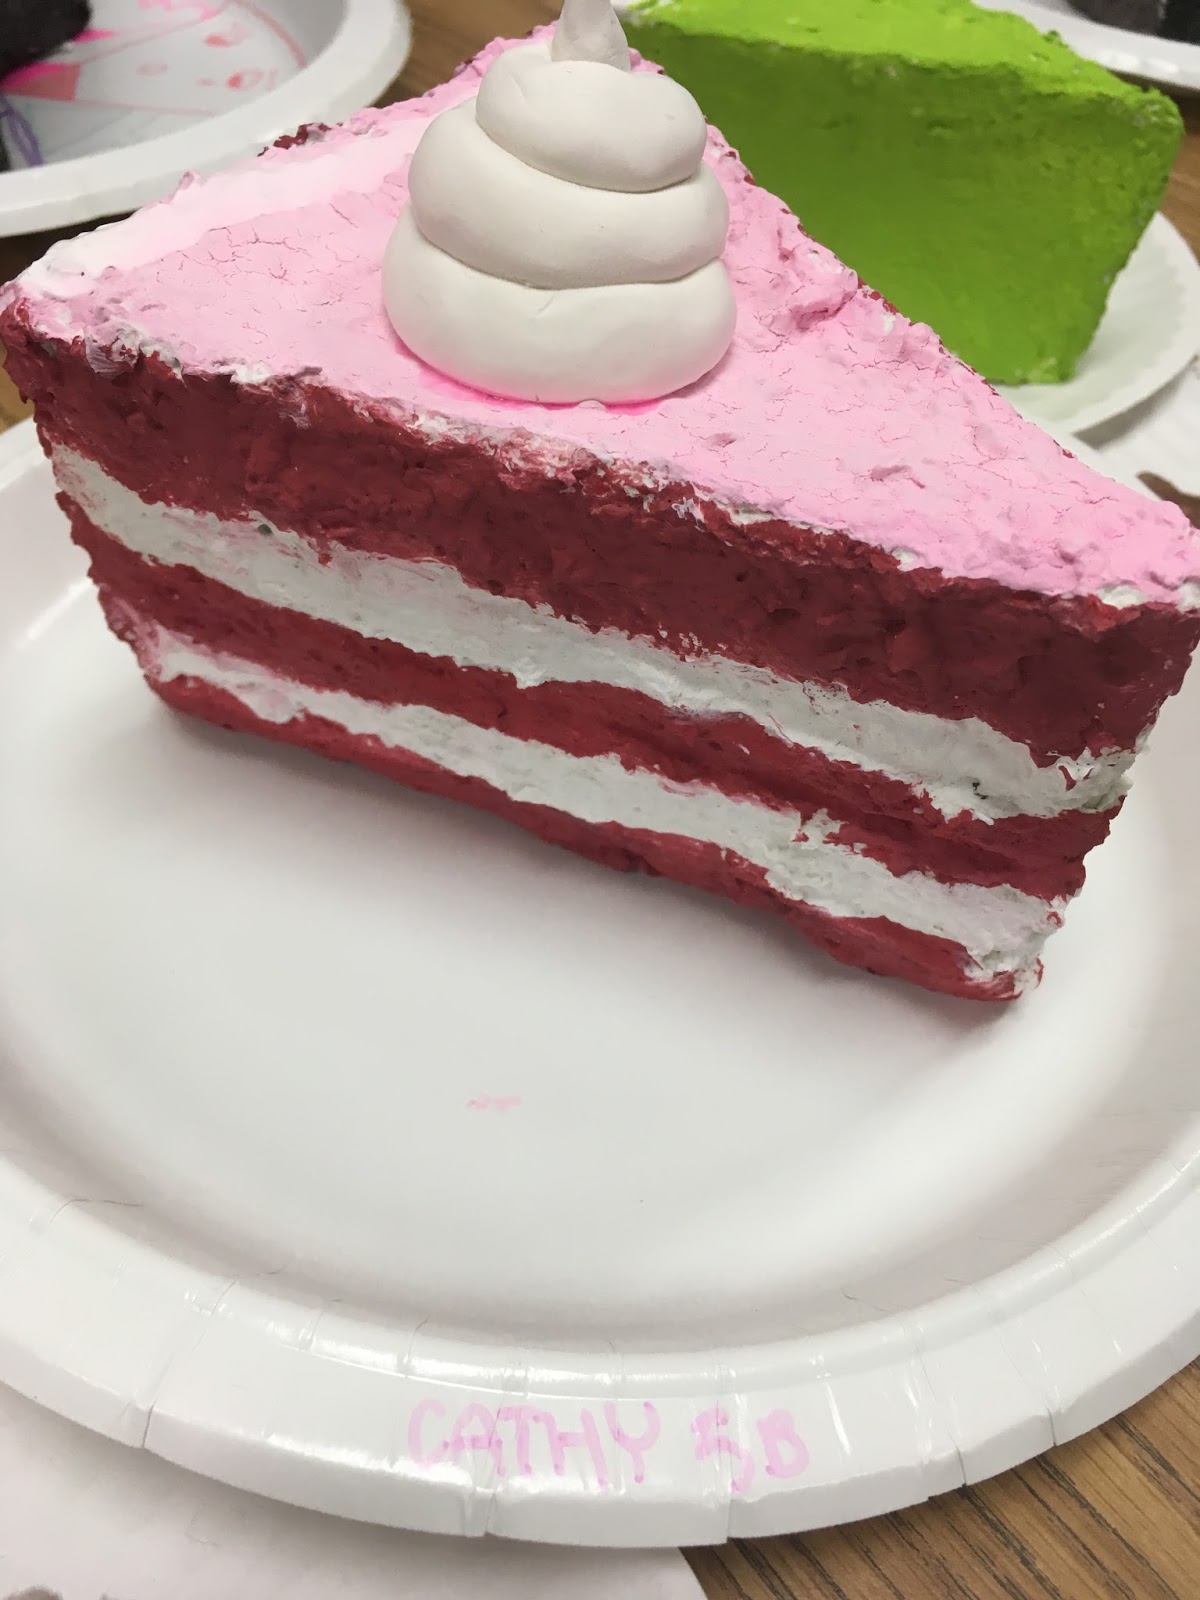
We made: milk chocolate, dark chocolate, vanilla, white, strawberry, cheesecake, pumpkin pie etc.
We used modge podge to add shine later. Most of the paints were crayola or prang temperas.
I had some craft paints from home that I also added to the mix.
Notice the caulk. We used it to add texture and hight.


Day 4 was the topping or extras day.
Beware....some kids started to derail here. Yikes!
We had to revisit our plan and stay on course.
I mixed up drizzle in squirt bottle, used puffy paint and made a mixture of glue and shaving cream to create topping. White model magic seem to be one of the most popular as well as marshmallows.
Craft foam was also popular for cut out limes, lemons and chocolates.


Yes, we used real sprinkles too!


I found the doilies at the Target Dollar Spot.


I started adding them to my display cases for open house and #bigartday17
which this past Friday.


My third graders made clay cupcakes and 4th grade made donuts with clay.
Check back next week for a post on how we made them.
Yummy.
I love how well the collaborative display came together today.


The fifth graders also did the gum ball art that you see in the background.
That lesson is found in this previous blog with the cupcakes.
Enjoy! We sure did. I can't wait for the parents to see this tomorrow!
This comment has been removed by a blog administrator.
ReplyDeleteThis comment has been removed by a blog administrator.
ReplyDelete